
Even experienced Inklingo quilters will learn something from the Six Simple Steps With Scraps PDF. I designed this PDF with input from Inklingo quilters, and some say it is even better than The Inklingo Handbook.
I’ve wanted to do this for a long time. I finally did it!
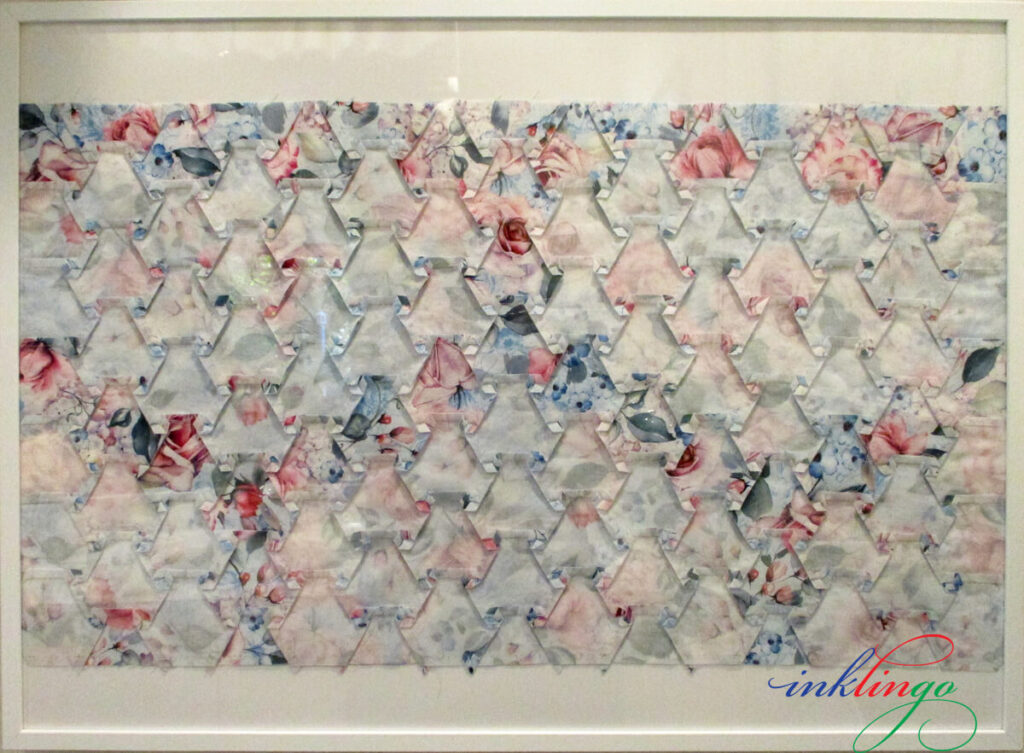
1. Frame a quilt top featuring the back with the lines printed on the fabric.
2. Feature a wonderful pressing technique.
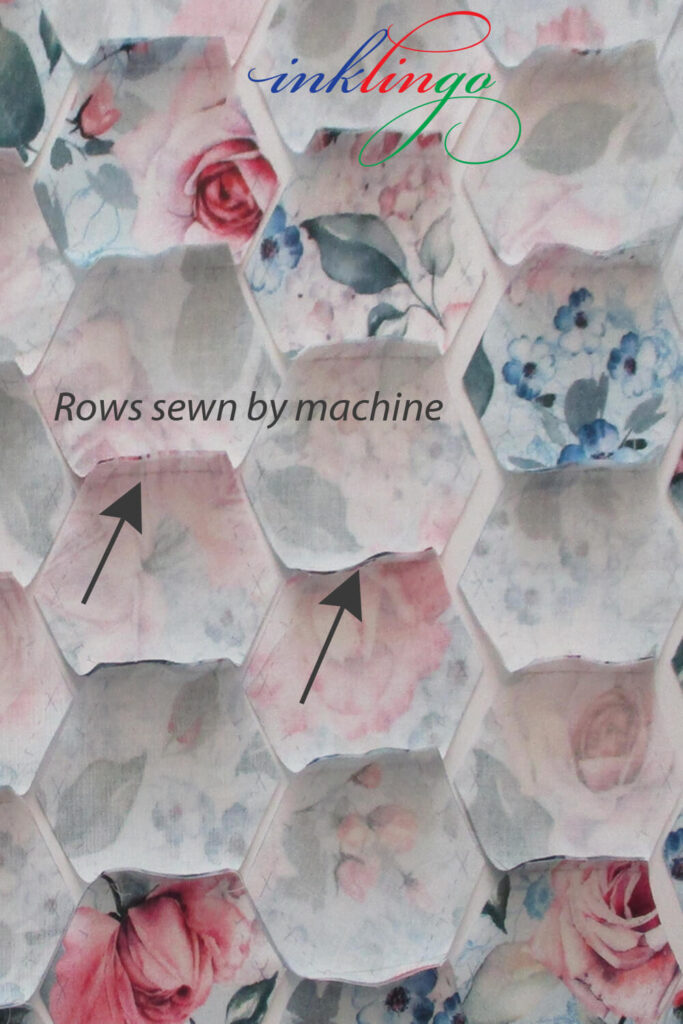
3. Sew some seams by hand and some by machine in a “hybrid.”
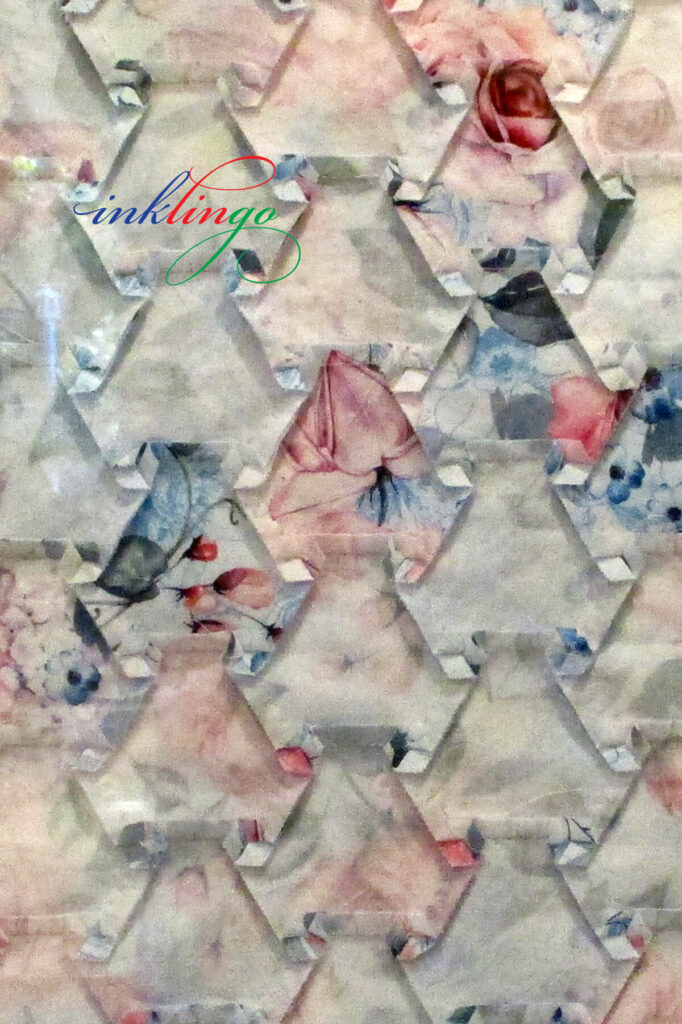
4. Use only one fabric for all the shapes, some printed on the front instead of the back (above).
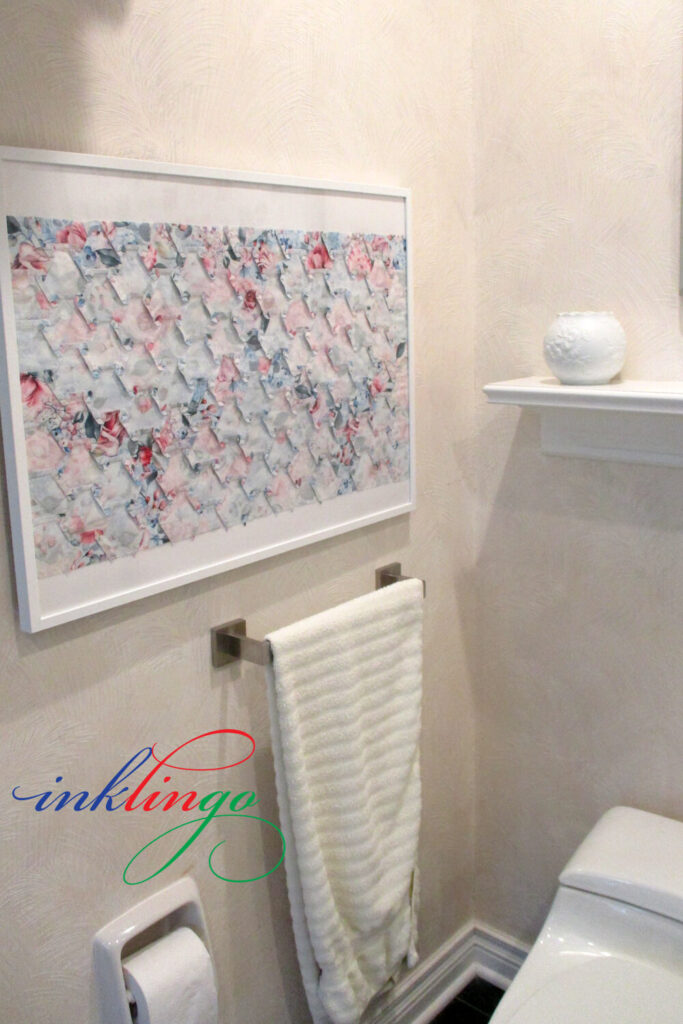
Do you have a quilt or a quilt top in your bathroom?
This has been a fun project. I’m happy with the results.
Hexagons press so beautifully that they were the perfect choice for this. The fabric had to be perfect too. I needed something with very soft colors to suit the room, and the wrong side of this fabric was ideal.
One fabric? Yes. I printed some hexagons with the sewing lines on the back of the fabric and some hexagons with the sewing lines on the front. Since it was going to be hung with the back showing, it was important to be able to identify the front of the fabric in some of the shapes.
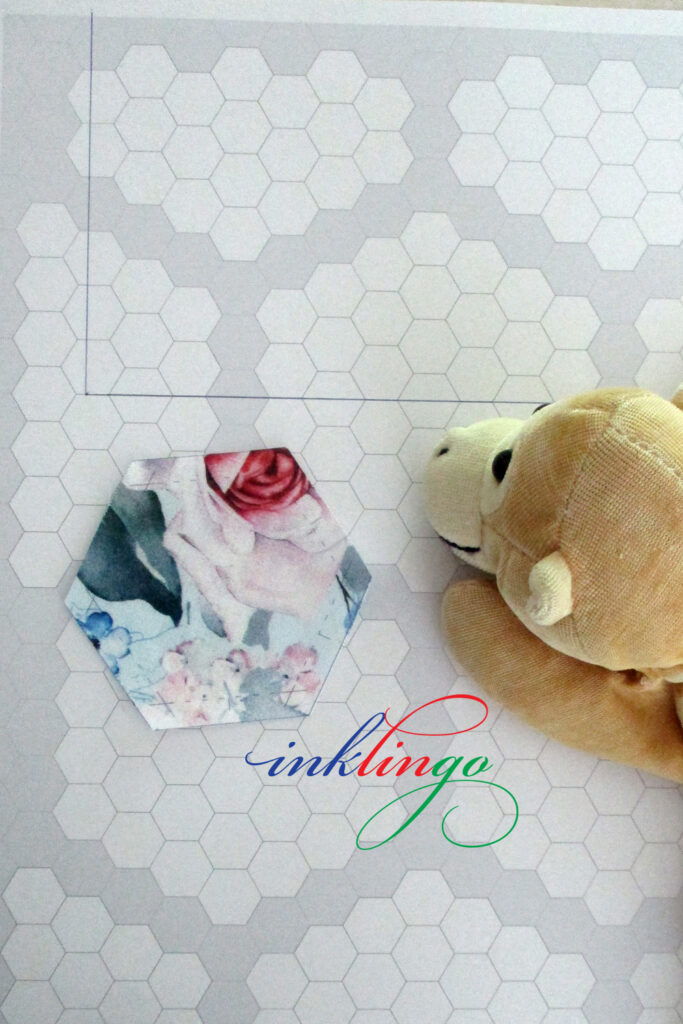
I used one of the worksheets in the Hexagon Quilt Design Book to create a simple design that would fit the frame. The math is slightly more complicated for hexagons than for square blocks, but the info in the design book makes it as easy as possible.
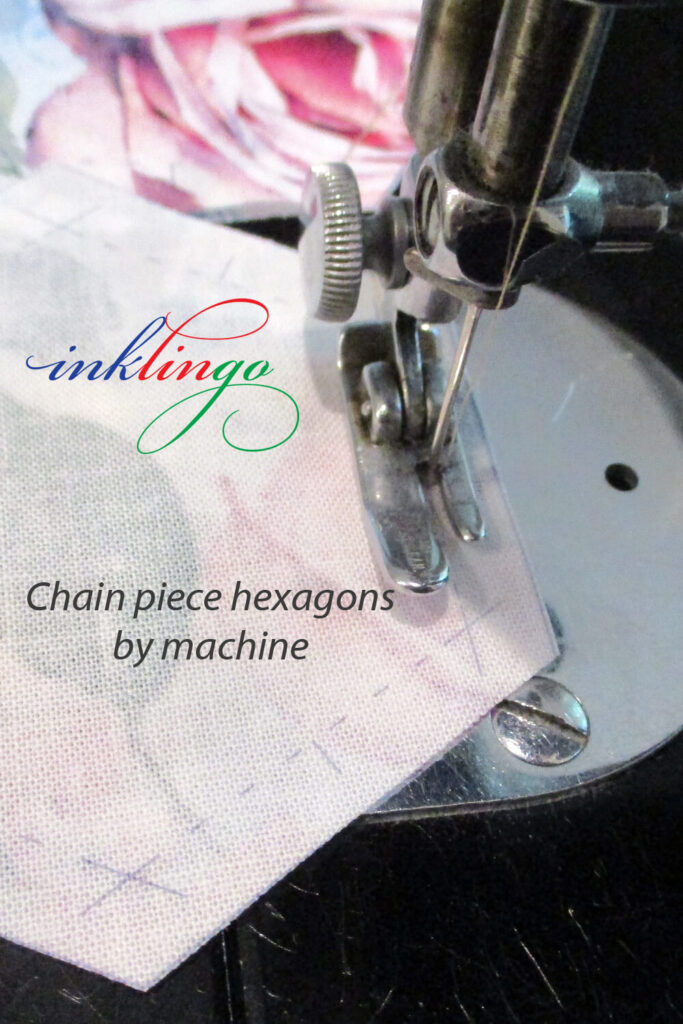
I needed to stay organized for chain piecing by machine, so I decided to make this design by sewing rows of hexagons.
I was very organized, but I still had to do a little bit of ripping, usually because I sewed a shape with the wrong side up.
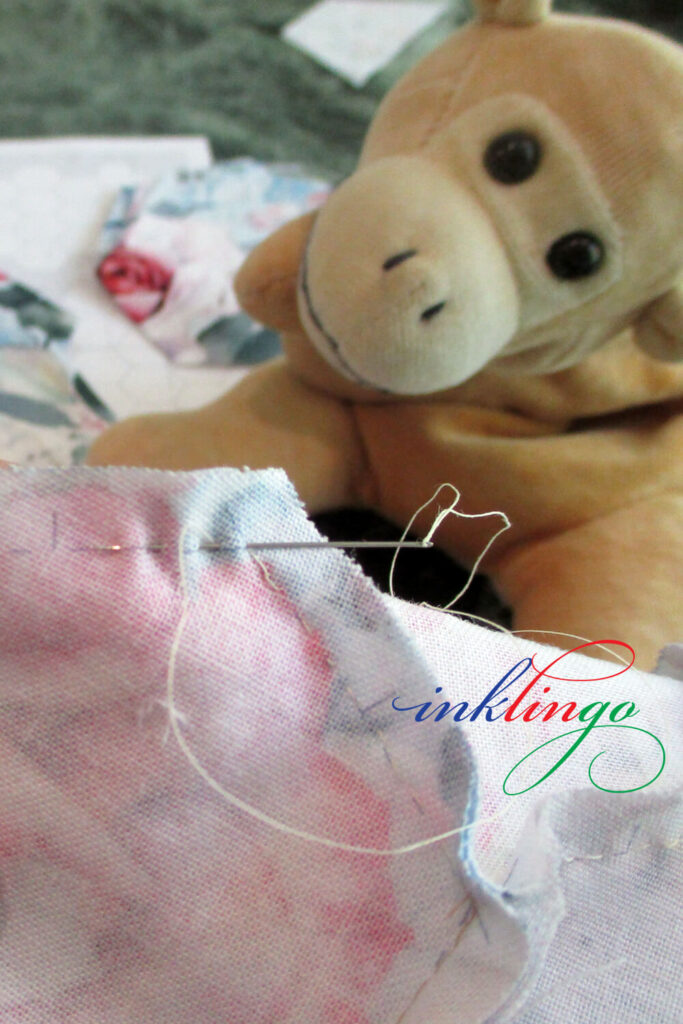
Once all the rows were assembled, I joined them by hand with “continuous stitching,” turning a corner at the end of every seam.
With two lengths of thread, I could sew a row in less than 20 minutes using a simple running stitch with back stitches. Continuous stitching is demonstrated in detail in the Hexagon Quilt Design Book.
Choosing the fabric, getting organized, chain piecing the rows, hand piecing, pressing, and framing only took a couple of days.
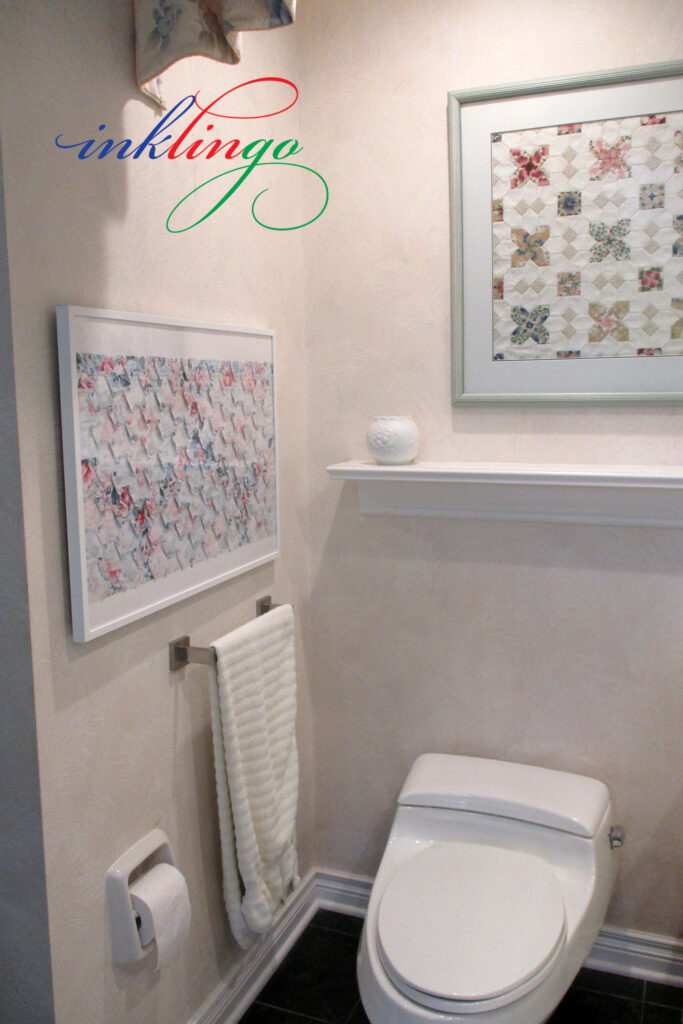
Now, I will be able to invite anyone into our bathroom to admire the result. Monkey thinks it is a bit weird, but that’s okay. Russ just laughs.
My non-quilting/non-sewing friends don’t always understand why I am so passionate about Inklingo and how it enables me and all quilters to make better quilts. Now I can show them.
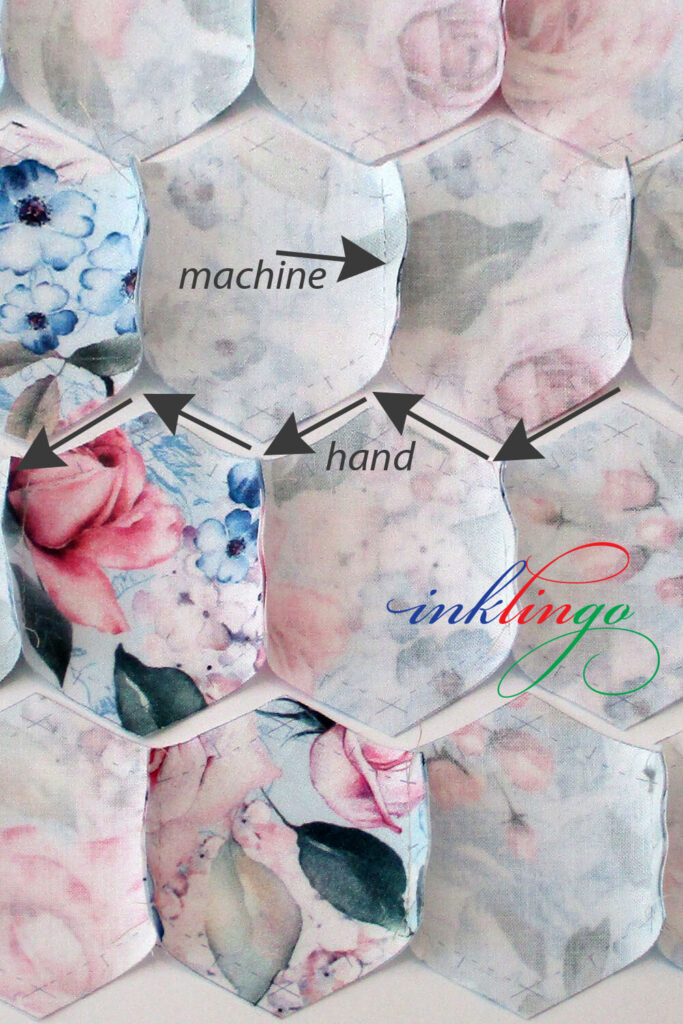
I love machine piecing with Louise (Featherweight) and hand piecing with a running stitch, so hybrid piecing is my favorite technique. I also use it for Winding Ways. Winding Ways—Quilting the Inklingo Way is an excellent resource for this kind of sewing.
I hope you love the lines and the way my quilt top is pressed, too. Thank you for visiting.
Let me know what quilts you have in your bathroom too, okay?
Beautiful Linda…How did you frame the quilts?
Hi Syerli! I is always nice yo hear from you. This was a frame I was using for something else and it dis-assembled and re-assembled easily. The “quilt” is so pretty that now I think I might want to have a mat cut for it too.
LOL, what a message for guests in your bathroom: “I’ll show you my backside….now show me yours!” And then the ‘pressing’…
There is probably a great poem in this, I know I will be thinking about that for days
You always have a poem in y6our heart, Annika. Let’s see what you do with this. What rhymes with backside?
Let me tell you about a lady in B.
Who forcibly pulls unsuspecting passersby into her WC
To ‘show them how neatly she pressed’
To ‘prove that her backside is best’
She’s a loo-natic, so just smile and agree!
😉
You know how to make a loo-natic happy, Annika. I hope you are having a great day!
Yes, and next time I visit your bathroom I will make sure to compliment your ability to lay down perfectly straight lines! Thank you for cracking me up several times today!
It is mutual. LOL
I’m only kidding, of course. Everybody knows a bathroom is the place to visit to attend to pressing matters!
You are wicked. I love it!
What a cool idea! I love the back of good piecing. Clever to use both sides of the fabric, too
Thank you, Sonia! I’m glad you like it.
I just love this idea! I’m new to Inklingo and I just redid my bathroom. I’ve bee trying to figure out what to hang on the walls. I think now I have a great idea! Thank you for sharing this.
Hi Sandy, I’m glad you like this idea and I hope you will let me know what you decide to do. I’m sure everyone would like to see photos.
love love love it. and you!
ellen
Thank you, ellen! You made my day!
I love this!!! I have always thought Inklingo is so beautiful on the back. Now here is a way to display it. I might make one with the right side if the fabric on the back so I can have pretty fabric and the pretty inklingo back
I hope you do it, Lori AND share photos with the rest of us!
What a great idea, Linda! Now I’m getting ideas re what to do with some of my smaller tops! Some of the backs are fascinating to look at!
You press everything so beautifully, Cathi. I think you could make a great display!